The Knowledge That I've Gain In This Journey
In this short four months alone, I've managed to accumulate a vast array of knowledge in terms of audio recording and production. In this blog post, I'm going to give a summary of what I've learnt in this journey by segregating it into six parts: constructing a song model, arranging, songwriting, audio recording, production and mixing.
1) Constructing a Song Model

I then decide what key I want the song to be in as well as the tempo at the top window of the project.


I recorded the bass line for my song first by pressing 'R' on the keyboard and played the line alongside the click.

If I didn't like that particular recording, I would simply select that particular region, delete it and try again. Whenever I want to repeat a particular track, instead of recording again I just copy the region and paste it where I see fit. The construction of the entire song is basically a process of recording, cycling through the recorded tracks, and copy and pasting the recorded tracks.

There are also MIDI effects such as arpeggiators, chord builders and randomisers which takes a really simple idea and make it interesting.


3) Songwriting

Traditionally, many artists come up with the melody, lyrics and chord progression before arranging it for the instruments. In this modern age of technology, this process is pretty much reversed. Here are a few things that I've learnt in terms melody and lyrics construction:
Improvising:
Many ideas can be generated just by improvising on an instrument. For my case, I set my project in cycle mode and carry on from there with my guitar.
Syncopation:
Instead of putting all the notes on the beat, it may be a great idea to move a note or two slightly off bit as this tends to add more excitement.
Keep it simple:
Many of the best pop melodies are easy to sing along to, therefore complex doesn't necessarily mean good.
Verbal Phrases:
Sometimes a certain phrase can generate a brilliant idea as the rhythm of the words can fit in really well with the melodic idea.
There are a few way that I have learned to make my melodies more exciting and the piano roll in Logic Pro X can be a great tool:


4) Audio Recording


5) Production


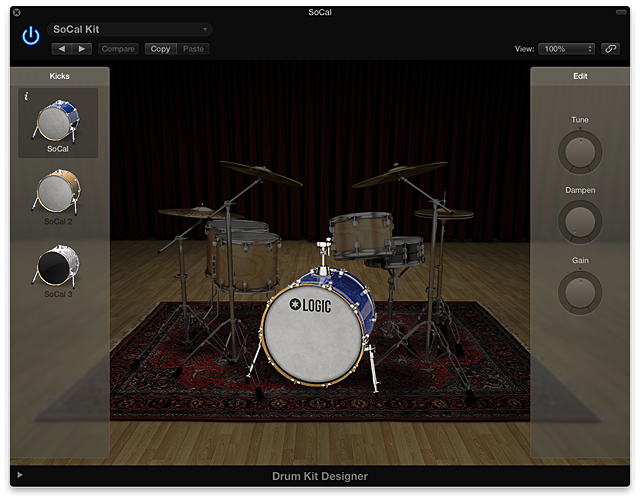
In the producing stage, I would usually like to start with the drums. Logic's drum kit designer is a great place to start adjusting and tuning the kit.
From there I moved on to different instruments and started tweaking each and every one of them until I get a sound that I'm satisfied with. One of the ways to make a track sound more interesting is to double it. There are a few ways to this but I'll usually just make an exact copy of the track I want to double up. For this instance, I wanted to double up the acoustic guitar.

Then I started searching for sounds and effects that could be added to the duplicated track. As you can see, I've added some delay (Echo) and reverb (Chroma).


As for synthesisers, many producers in this age would not settle for the presets, most would start off by choosing a preset and then adjusting them from there. There are a few components to subtractive synthesis and they are:


6) Mixing
After completing my production of Grace's song, I passed the audio stems to Alvin while I was in charge of mixing Li Ping's song which was produced by Jia Rou. To export tracks as audio stems, I made sure to select all the tracks that are needed to be exported.

I then selected Export ---> Tracks as Audio Files.

After making sure that everything is alright, I selected Export.

Exports will not work when effects are on auxiliary tracks, I have to use 'Bounce' instead. For this instance, I soloed the lead vocal track and and turn on cycle mode.

I should be able to easily noticed that the auxiliary tracks with the effects are not muted in the mixer.

From there, I just Bounce the track to PCM.


Once I found a balance, I've learned to pan certain tracks to give it that stereo effect instead of being one dimensional. Generally speaking, tracks such as the lead vocals, bass and the kick drum should always remain at the centre.


For the hi-hats, I got rid of any frequencies between the 20Hz to 500 Hz range as there's no need for any frequencies to be there. I also applied a low pass filter at the 10k to 20k range. In Li Ping's song, I added a sample delay to the hi-hat and applied 100 samples of delay to the left side. The difference is very subtle, almost imperceptible. It is also not a bad idea to add a DeEsser to the hi-hat to reduce some sibilance. In this instance, I used the Hi-Hat Smoother preset in Logic.

For snare drums, I've learned to get rid of the lows and boosting some of the highs.

As for the bass, I gave it some space in the 0Hz to 100Hz range by removing those frequencies in the kick drum, I decided to apply a boost in that range as well as cut off some of the frequencies in the 200Hz to 1000Hz range as well as the 2k to 20k range.

After doing some EQ, I inserted a compressor and use the E Bass preset.

Essentially, this is what I did for many of the tracks and eventually I slowly managed to fit the pieces of the puzzle together just by using EQ and compression for frequency correction.

From there, I moved on to adding effects to certain tracks. In Li Ping's song, I added some reverb to the drums by selecting all of the drum tracks and send them to a bus. I then renamed the newly created auxiliary track to Drums Verb.


I also added a tape delay to the lead vocals by sending it to another bus.

So after shaping the sound, I then moved on to the last stage which is automation. Automation mode can be turned on by pressing 'A' on the keyboard.

There are essentially four main automation modes, which are:
An example of the use of automation is the lead vocals for Li Ping's song, where it could get soft on the low notes. So I automated them by creating four dots, with two dots on each side of that particular region. I then selected the two inner dots of each side and raised them up.

Automation takes the listener to a journey. Therefore, the question that I would frequently ask myself is "what do I want to hear at certain parts?". By answering that question, it will be easier for me to decide which tracks and regions to automate.


1) Constructing a Song Model
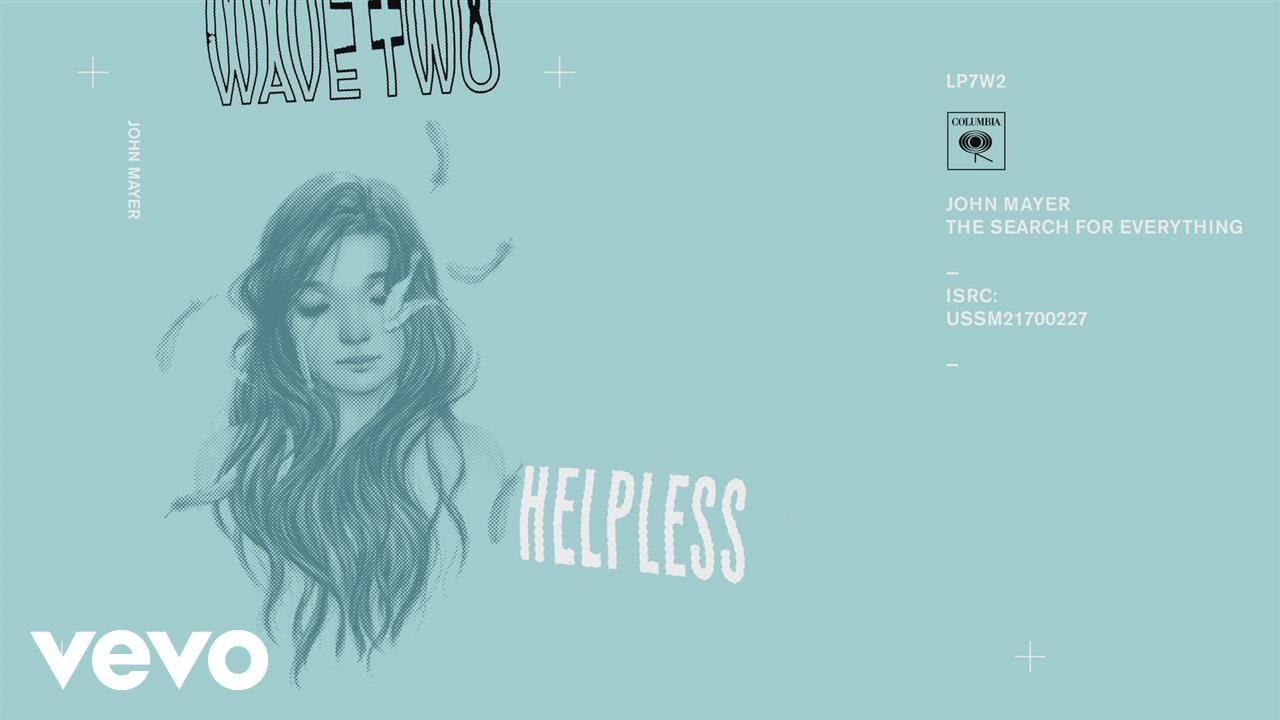
Before I even get started on writing a song, I need a source of inspiration, it doesn't have to be brilliant, but it will get me started. I've learned to listen more closely and pay better attention to songs. In this semester, the song that I chose to emulate was Helpless by John Mayer. So I formed a template and start noting down every detail of the song, here's my template:
--------------------------------------------------------------------------------------------------------------------------
- Style: Blues
- Tempo: 104 Bpm
- Mood: Energetic
- Instruments: Electric guitar, bass guitar, drums, keyboard, synths, vocals
- Role of instruments: 1) Lead - Guitar, Vocals
2) Foundation - Drums, Bass Guitar
3) Fills: Guitar, Keyboard
4) Rhythm: Guitar
5) Pad: None
- Form: Intro - Verse - Chorus - 2nd Verse - 2nd Chorus - Solo - Bridge - 3rd Chorus - Outro
- Phrase structure of the melody: Verse - ABCD
Bridge - AABC
- Chords: Intro, Verse, Solo and Outro - F - C - F/A - C/G - F/A - Am7
Build up before bridge - E
- Hook: If I'm helpless, tell me now, tell me now.
- Intro: Groove establishment
- Outro: Guitar solo fade out
-------------------------------------------------------------------------------------------------------------------------
After analysing my reference song, its time to construct my own song model. I noticed that after breaking down the song, its actually not extremely complex There are a couple of things in which I take from the song and use them in my own way. So here's the blueprint for my song:
Form: Intro - Verse - Chorus - 2nd Verse - 2nd Chorus - Solo - Bridge - 3rd Chorus - Outro
Intro: Groove Establishment
Tag: Guitar Solo
Harmony: Verse - 3 chords, a 1-4-5 blues progression
Chorus - 4 chords
Instrumentation: Foundation - Drums, Bass
Lead -Vocals, Guitar
Fills - Trumpet, Organ, Guitar
Rhythm - Organ, Trumpet, Guitar
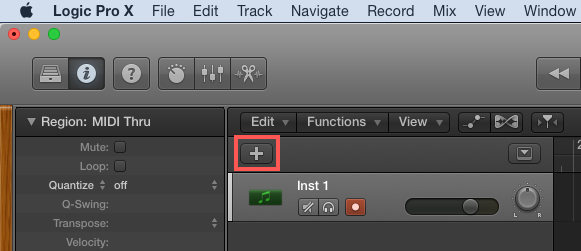
After constructing a plan, it's time to get creative and begin constructing my song on Logic Pro X. I usually begin by adding 5 new tracks to the project.
After creating my tracks, I can create some markers breakdown my song into different parts.

2) Arranging
Once I have the basic plan, it's time for me to write. Regardless of how I write, I will always have to start with an idea. There are multiples ways to start such as a drum beat, bass line, chord progression and an instrumental lick. For my song, I had a funky bass line in my mind, so I started with that and built around it. Here are a couple of ways to start a song that I've learned in this journey so far:
No Introduction (Bruno Mars - Grenade)
Groove Establishment (Billie Jean - Michael Jackson)
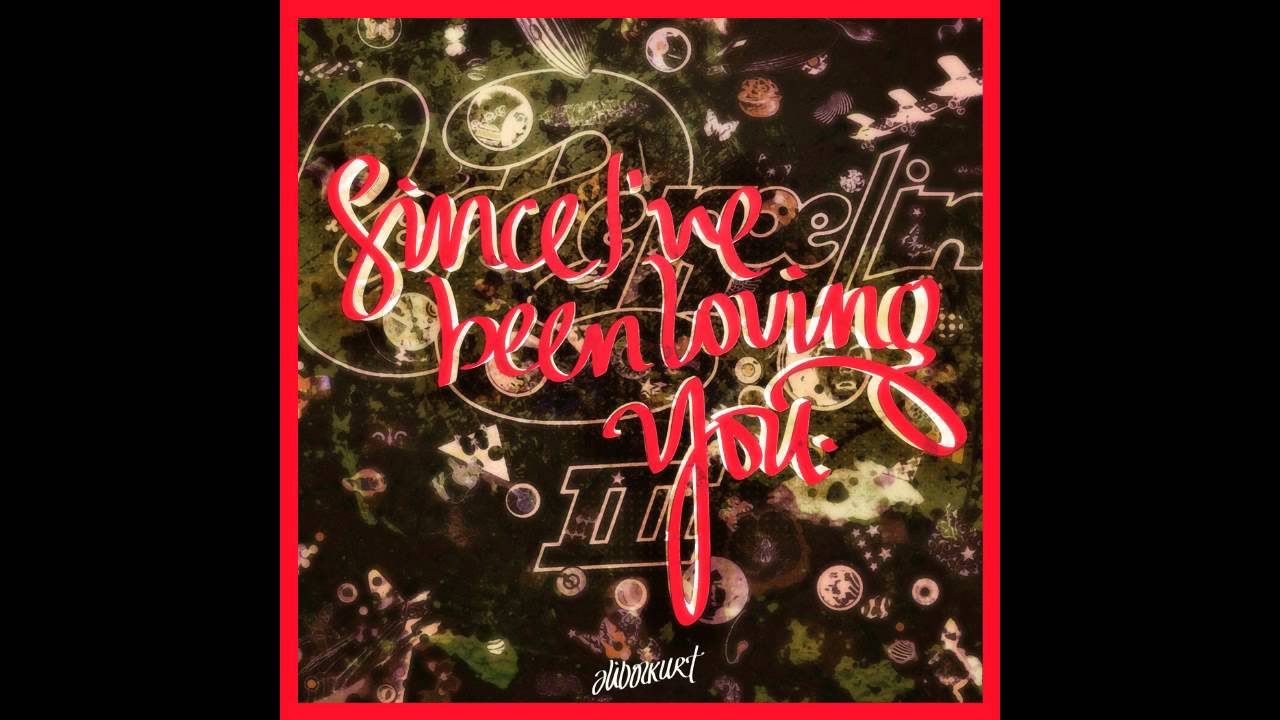
Instrumental Solo ( Since I've Been Loving You - Led Zeppelin)
For my song, I started with the bass line to establish the groove before the vocals come in. After I've created my tracks in Logic Pro X, I brought out the Library and Channel Strip which can be done easily by pressing 'Y' on the keyboard for the Library and 'I' for the Channel Strip. Or I could just locate the symbols at the top left of the window.
From there I can test and choose the instruments that I want and Logic Pro X has such a wide variety of options.
After that, I would want to make some slight adjustments to the settings and the tone of the instruments by clicking the Smart Control symbol on the top left or by pressing 'B' on the keyboard.
For my song, I chose to use Logic Pro's own drummer, Jesse - Funk Rock and I selected the 'Broken Glass' beat preset. While listening to the drum track, I learned to adjust the loudness and complexity of the drums to suit my preference.

I recorded the bass line for my song first by pressing 'R' on the keyboard and played the line alongside the click.
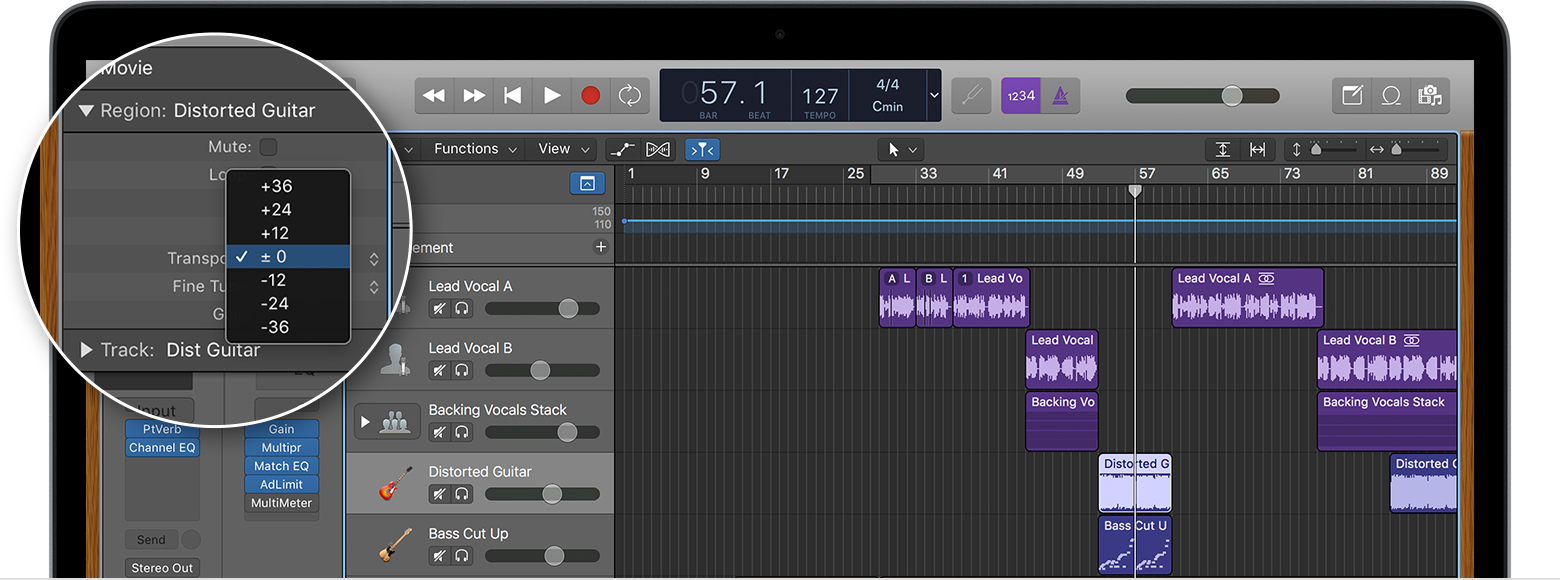
There are several MIDI editing commands that are a great way to edit lots of notes quicker such as:
Transposition in semitones
Quantisation which snaps notes to the nearest grid
Besides software instruments, Logic Pro X also enables me to record audio. As I'm a guitarist, I plugged in my guitar to an interface which connects to Logic Pro X. From there, I turned on input monitoring and recording and used one of Logic Pro's wide array of guitar presets.
3) Songwriting
Traditionally, many artists come up with the melody, lyrics and chord progression before arranging it for the instruments. In this modern age of technology, this process is pretty much reversed. Here are a few things that I've learnt in terms melody and lyrics construction:
Improvising:
Many ideas can be generated just by improvising on an instrument. For my case, I set my project in cycle mode and carry on from there with my guitar.
Syncopation:
Instead of putting all the notes on the beat, it may be a great idea to move a note or two slightly off bit as this tends to add more excitement.
Keep it simple:
Many of the best pop melodies are easy to sing along to, therefore complex doesn't necessarily mean good.
Verbal Phrases:
Sometimes a certain phrase can generate a brilliant idea as the rhythm of the words can fit in really well with the melodic idea.
There are a few way that I have learned to make my melodies more exciting and the piano roll in Logic Pro X can be a great tool:
- Repeat it
- Repeat the rhythm and change the notes
- Repeat it and add a note
- A partial repetition
At this point, I would have the chord progression and the texture of the song pretty much done. From there I can come out with a melody. Logic's loop record and composite function is a great way for me to find a decent melody for my song.
4) Audio Recording
After I got the song written down, I passed it on to a producer while I'm in charge of producing a song belonging to another person. I passed my song down to Janice while I was in charge of Grace's song. For this project, we focused on getting the vocals recorded.
There are two "Umbrella" categories of studio microphones which are:
- Condenser Mics
- Dynamic Mics
Condenser Mics tend to work better on instruments with high frequencies such as acoustic guitar and piano whereas dynamic mics work better on low-mid frequency instruments such as drums and electric guitar cabs. Below are the nine subcategories of microphones:
- Large Diaphragm Condenser Mics (standard for recording vocals)
- Small Diaphragm Condenser Mics (great for home studios)
- Dynamic Mics (industry standards for recording electric guitar, rock vocals and drums)
- Bass Mics (kick drum mic)
- Ribbon Mics
- Multi-Pattern Mics (cardioid, omnidirectional, figure8)
- USB Mics (bedroom studios, podcasting)
- Boundary Mics
- Shotgun Mics (Outdoor tasks)
There are three polar patterns in vocal mics which are:
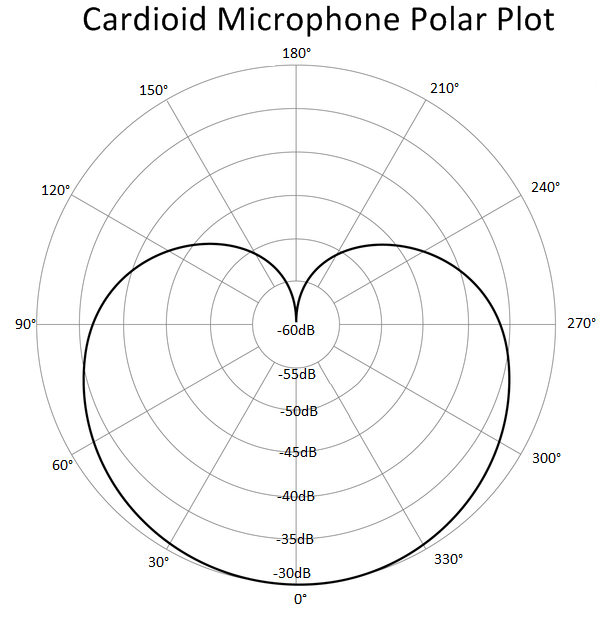
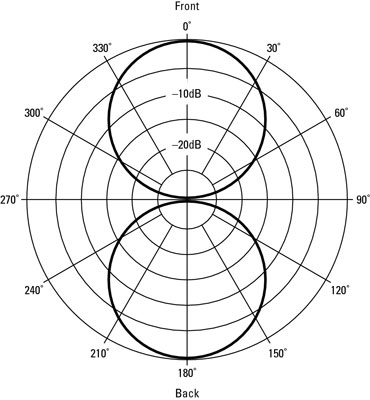
- Cardioid - picks up best from directly in front of the capsule while rejecting sound from directly behind.
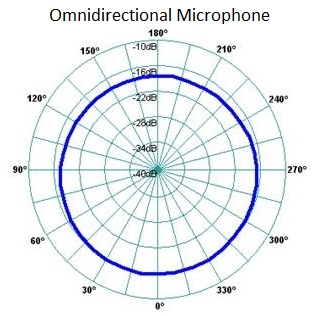
- Omnidirectional - picks up equally well from all directions, usually in mics used for acoustic music.
- figure8 - picks up sound from in front and behind while rejecting sound from the sides.
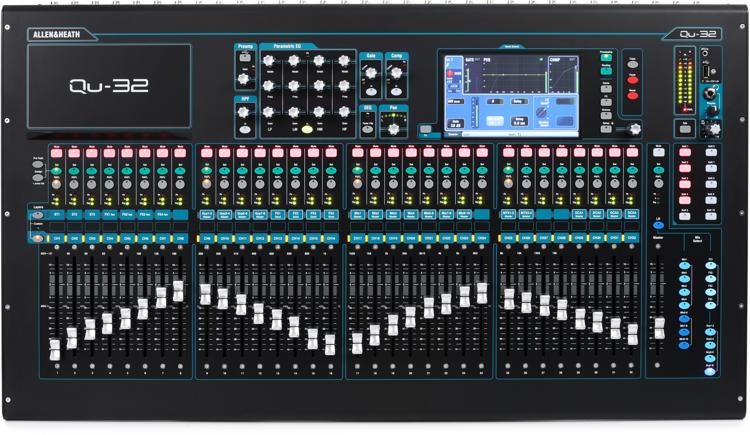
The mixer that we are using in this school is the QU-32. After setting up the mic in the live room and connecting it to input 12 of the Snake as well as plugging the headphone return into the Snake, we're ready to proceed to the control room.
In the control room, I had to turn on phantom power before recording and adjust some of the volumes on the mixer to avoid clipping. The faders at the bottom essentially controls what you hear from the speakers while the preamp controls what Logic Pro X hears. Before recording, it's always safe to have low latency mode turned on.
5) Production
After getting the vocals recorded, it's time to do some cleaning up. Certain mistakes and background sounds can be taken off with a noise gate or by using the marquee tool to delete that particular region.
In the producing stage, I would usually like to start with the drums. Logic's drum kit designer is a great place to start adjusting and tuning the kit.
From there I moved on to different instruments and started tweaking each and every one of them until I get a sound that I'm satisfied with. One of the ways to make a track sound more interesting is to double it. There are a few ways to this but I'll usually just make an exact copy of the track I want to double up. For this instance, I wanted to double up the acoustic guitar.
Then I started searching for sounds and effects that could be added to the duplicated track. As you can see, I've added some delay (Echo) and reverb (Chroma).
I've also adjusted the EQ of the duplicated track as I want this track to be softer than the original and not clash with it.

- Oscillator
- Filter
- Amp
- LFO
An oscillator basically generates a repeating signal in a particular waveform. There are four main types of oscillators:
- Sine - smooth, mellow sound
- Sawtooth - Buzzy
- Square - Hollow and nasal sounding
- Triangle - Sounds like a sine wave but buzzes slightly like a square wave
A filter acts as a modifier. The two main adjustments one could make is the cutoff which is the point at which the filter starts to act on the sound, as well as the resonance, which can lead into self oscillation. Below is an example of a filter and as you can see I tweaked around with the cutoff a bit.
The amplifier essentially controls the volume of the sound. Most synths would have an envelope generator which are broken into four parts: attack, decay, sustain and release.
Lastly, I've enhanced my knowledge in the effects and processors field. An effect treats your audio. This means that an effect adds its own signal to the existing signal (such as a delay effect that adds echos, a reverb effect that adds reverb, etc). Meanwhile, a processor changes the entire signal such as a compressor and EQ.
Effects:
Reverb
A reverb is a complex series of echoes. Reverb can be used to glue things together as well as add depth and character to a sound. Backing vocals for example many times have lots of reverb and that's why their more far behind compared to the lead vocals. There are several types of reverb such as room, hall, chamber and spring. Logic's Space Designer Reverb is a brilliant reverb effect and in this instance I used a plate reverb for the lead vocals in Grace's Song.
Delay
Delays are simpler echoes as compared to reverb and it is a great way to add some fatness to the sound. For Grace's song, I used a stereo delay and made some adjustments to the high cut and low cut.
Modulation Effects
Modulation effects such as choruses and flangers can fatten up your sound even more. In Grace's song, I've added a flanger and an ensemble just to add some layers to the lead vocals.
Processors:
EQ
EQ is the process of adjusting the balance between different frequency components in your sound. It's a great way to shape your sound. In Logic's Channel EQ, there is a high pass filter, a low-shelving filter, four parametric bell filters, a high-shelving filter as well as a low pass filter. In the example below, I used the channel EQ to shape the lead vocals for Grace's song.
Compressors
Compressors are used to reduce the dynamic range and glue things together. They are also a great way to add some colour and saturation to your sound as many of them come with distortion. There are a total of seven compressors in Logic and often I find myself spoilt for choses.6) Mixing
After completing my production of Grace's song, I passed the audio stems to Alvin while I was in charge of mixing Li Ping's song which was produced by Jia Rou. To export tracks as audio stems, I made sure to select all the tracks that are needed to be exported.

I then selected Export ---> Tracks as Audio Files.


Exports will not work when effects are on auxiliary tracks, I have to use 'Bounce' instead. For this instance, I soloed the lead vocal track and and turn on cycle mode.


From there, I just Bounce the track to PCM.

With Li Ping's song, I started off by getting myself organised before I even start mixing. I grouped similar tracks together and sent them to different busses.

I also colour coded like instruments together and made some notes below the channel strips.

After getting myself organised, I started off by making sure that all of the tracks are well balanced. So I started adjusting each of the channel strips individually until a fine equilibrium is achieved.
Once I found a balance, I've learned to pan certain tracks to give it that stereo effect instead of being one dimensional. Generally speaking, tracks such as the lead vocals, bass and the kick drum should always remain at the centre.
Once the panning is done, I proceeded with EQ and Compression. In Li Ping's song, started off with the drums I boosted the 50Hz to 100 Hz range to give it that extra punch. From there, I decided to slightly bring down the frequencies between the 100Hz to 200Hz range to reduce the 'boxy' feel of the kick and let the punchiness come through. Furthermore, I reduced any frequencies between the 2k to 20k range.
After doing some EQ, I wanted to do some light compression and let that punchiness come through even more. I chose the Vintage FET and set the ratio to about 2.1:1 and the threshold to 15. I also added some soft distortion to it. In the end I would get about -1 to -2 of gain reduction.
For the hi-hats, I got rid of any frequencies between the 20Hz to 500 Hz range as there's no need for any frequencies to be there. I also applied a low pass filter at the 10k to 20k range. In Li Ping's song, I added a sample delay to the hi-hat and applied 100 samples of delay to the left side. The difference is very subtle, almost imperceptible. It is also not a bad idea to add a DeEsser to the hi-hat to reduce some sibilance. In this instance, I used the Hi-Hat Smoother preset in Logic.
For snare drums, I've learned to get rid of the lows and boosting some of the highs.
As for the bass, I gave it some space in the 0Hz to 100Hz range by removing those frequencies in the kick drum, I decided to apply a boost in that range as well as cut off some of the frequencies in the 200Hz to 1000Hz range as well as the 2k to 20k range.


Essentially, this is what I did for many of the tracks and eventually I slowly managed to fit the pieces of the puzzle together just by using EQ and compression for frequency correction.

From there, I moved on to adding effects to certain tracks. In Li Ping's song, I added some reverb to the drums by selecting all of the drum tracks and send them to a bus. I then renamed the newly created auxiliary track to Drums Verb.


In Drums Verb, I opened space designer and used the 'Drum Plate' preset. I made sure that I cut off all of the dry signal because this gives me the flexibility to control the level of reverb from the auxiliary track's fader.

I also added a tape delay to the lead vocals by sending it to another bus.

So after shaping the sound, I then moved on to the last stage which is automation. Automation mode can be turned on by pressing 'A' on the keyboard.
There are essentially four main automation modes, which are:
- Read: Plays back all automation that exists on the track.
- Touch: Modifiable, after the fader or knob is released, the parameter follows existing automation on the track.
- Latch: Similar to Touch mode, but after the fader is released, the new value replaces existing automation on the track.
- Write: Writes automation data in the traditional sense but will wipe anything else that has been recorded on all tracks.
Automation takes the listener to a journey. Therefore, the question that I would frequently ask myself is "what do I want to hear at certain parts?". By answering that question, it will be easier for me to decide which tracks and regions to automate.

At the end of the mixing stage, I organised the project by grouping tracks together and place them in a track stack to make it look more neat.

Conclusion:
In 4 months alone, I've learned so much from this tough but educational class. There were countless amounts of hurdles that I stumbled upon but I got back up thanks to my peers and lecturer. Amongst many things, I could always do better and I know that I will in the upcoming challenges. I thank you kindly for your attention and as usual, I would gladly welcome your feedback.


Comments
Post a Comment